camera angles for sizetrash in blender
NSFW CW
macro, hyper (explicit)

one of the more difficult parts of making renders of big and small characters is to find the camera angle that captures the essence of what you're trying to show. It's easy to forget that the 3D scene you're working on will eventually have to be condensed into a 2D image!
From my experience, there's two main ways to arrive at the final camera angle; scene-first or
pose/angle-first.
In this post I'll be describing my ways around this, and showing some examples from my scenes,
including the nsfw hyper floragato one
making the scene first
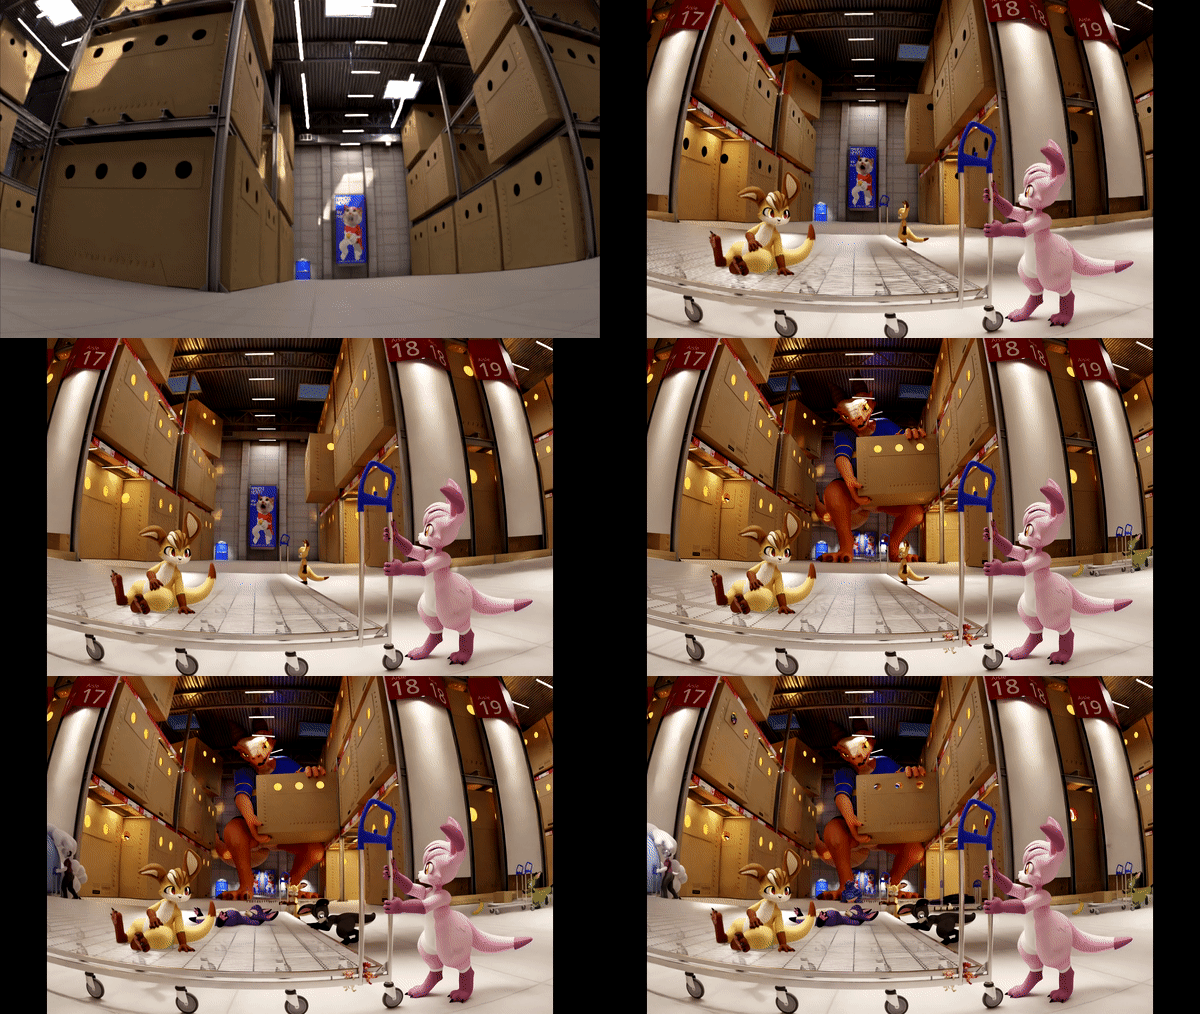
When the focus is more on the scene itself than a specific character, it makes sense to create the entire or most of the scene before finding where to place your camera and characters. This was the case for the warehouse scene seen in the gif above; all the parts required for a warehouse (walls, shelves, boxes, windows) were modeled first, then the scene was populated with characters, starting with the foreground kangaroos with the hilariously oversized trolley.
Trivia about the warehouse scene
The warehouse render was part of a sequence of pictures taking place in an IKEA-like store where instead of furniture you could buy (or hire?) a macro and have them delivered right to your house. There wasn't much logic in this but logic is not required for sizetrash.The sequence was going to have three more pictures showing the delivery and opening of the box at the buyers' house but the motivation to continue the sequence ran out before that could happen.
Working this way is great if you are making a scene that can be used multiple times, or if you just like building scenes in general. But sometimes you want the focus to be more on a character, with the rest of the scene being just a playground (this happens a lot in size art)
finding the camera angle first
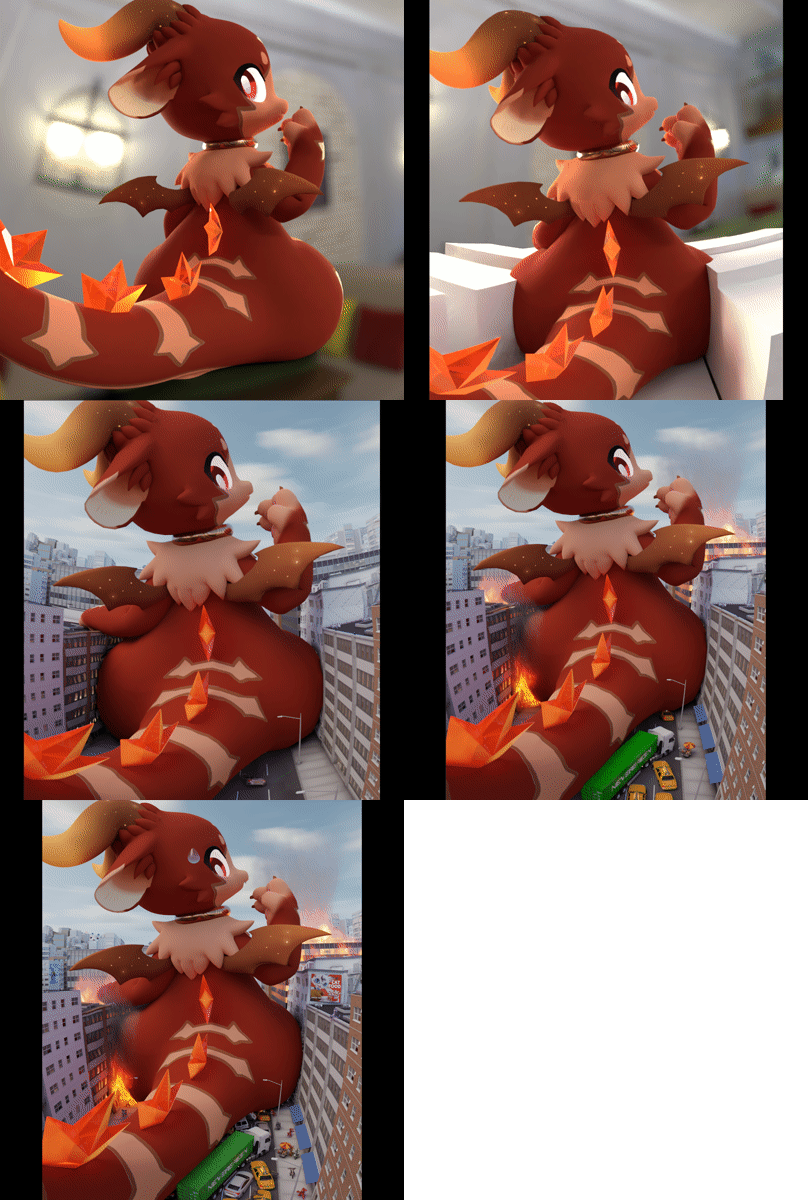
I make a lot of pictures that can be summarized as "character, but big". When I make or buy character models, I also start thinking of how to make them big, ideally with a unique twist so they don't all just end up stomping down the same street over and over.
One way to come up with new ideas is to try a few different poses and looking at the result from every angle, and then your brain will usually start generating more specific ideas. Then it becomes a process of tweaking the pose and camera angle until you converge on the pose you want, seen from the camera angle you want. Now you can start constructing a scene around the character (or you can plop both the posed character and camera into an already made scene)
A thing that's really useful when finding the camera angle in this stage is to add placeholder geometry with checkerboard textures to get a better idea of the scale of the character and how the camera will distort the scene (and with sizetrash, the camera will distort the scene, more on that later)
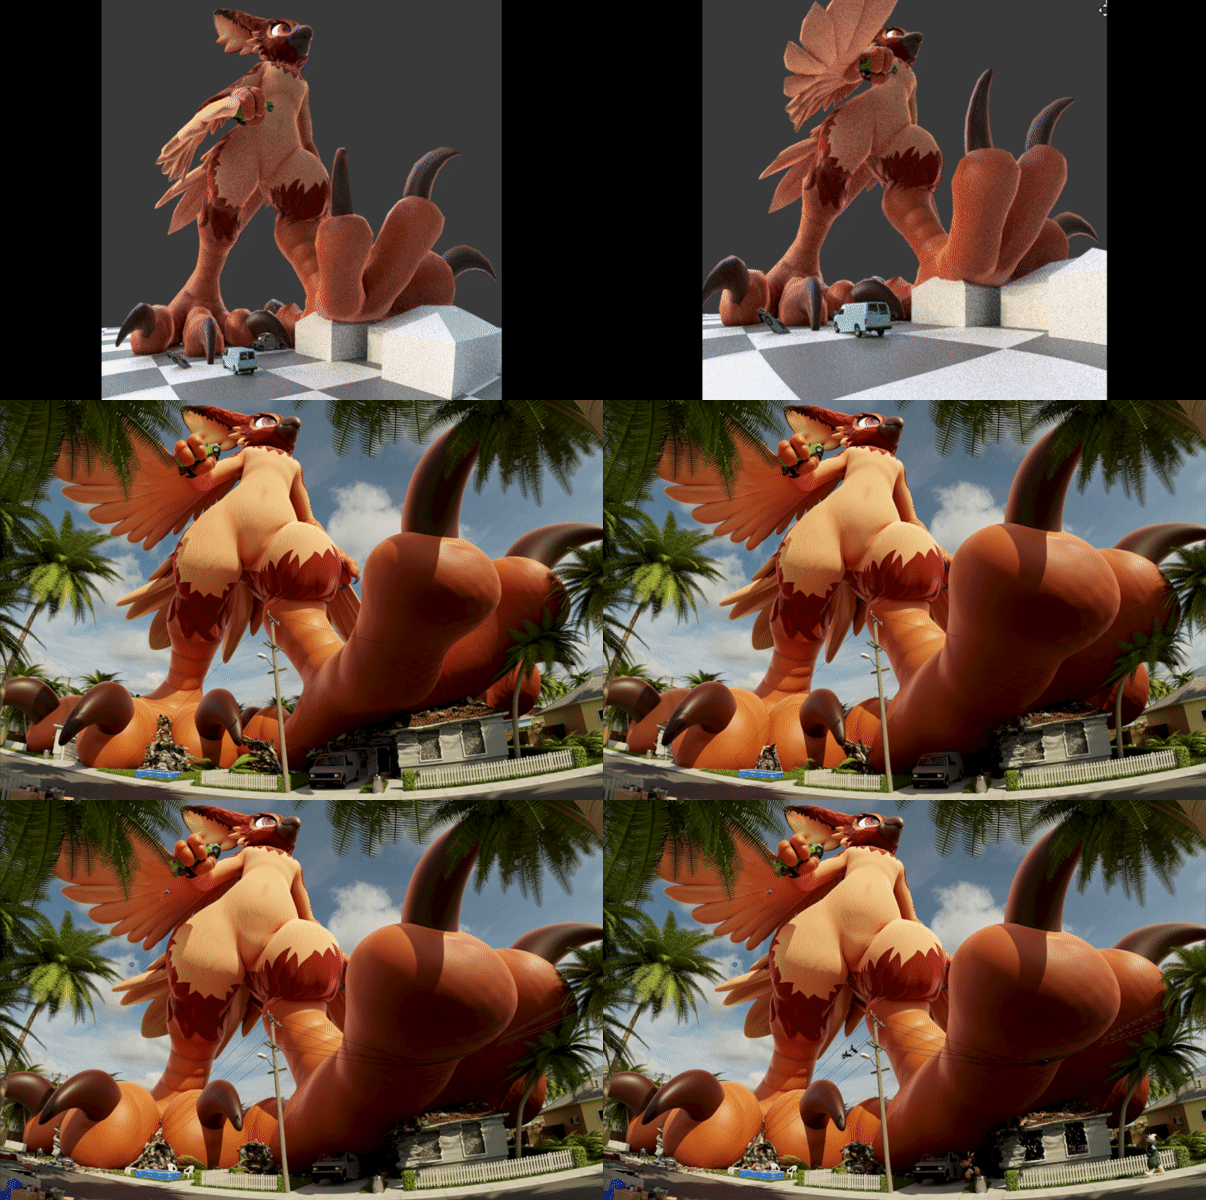
Working this way means that you won't be making stuff that won't actually make it into the final
piece, since you can always peek into the camera view. It's also easy to identify areas of the scene
where you might want to add some fun stuff.
The downside with tailoring a scene to a camera angle and pose is that it is much harder to re-use:

the choice of camera type
Before we can decide on our camera angle we might want to try different camera lenses that have other types of distortion than the default perspective lens. Blender has a few of these to choose from, and they all have their uses.
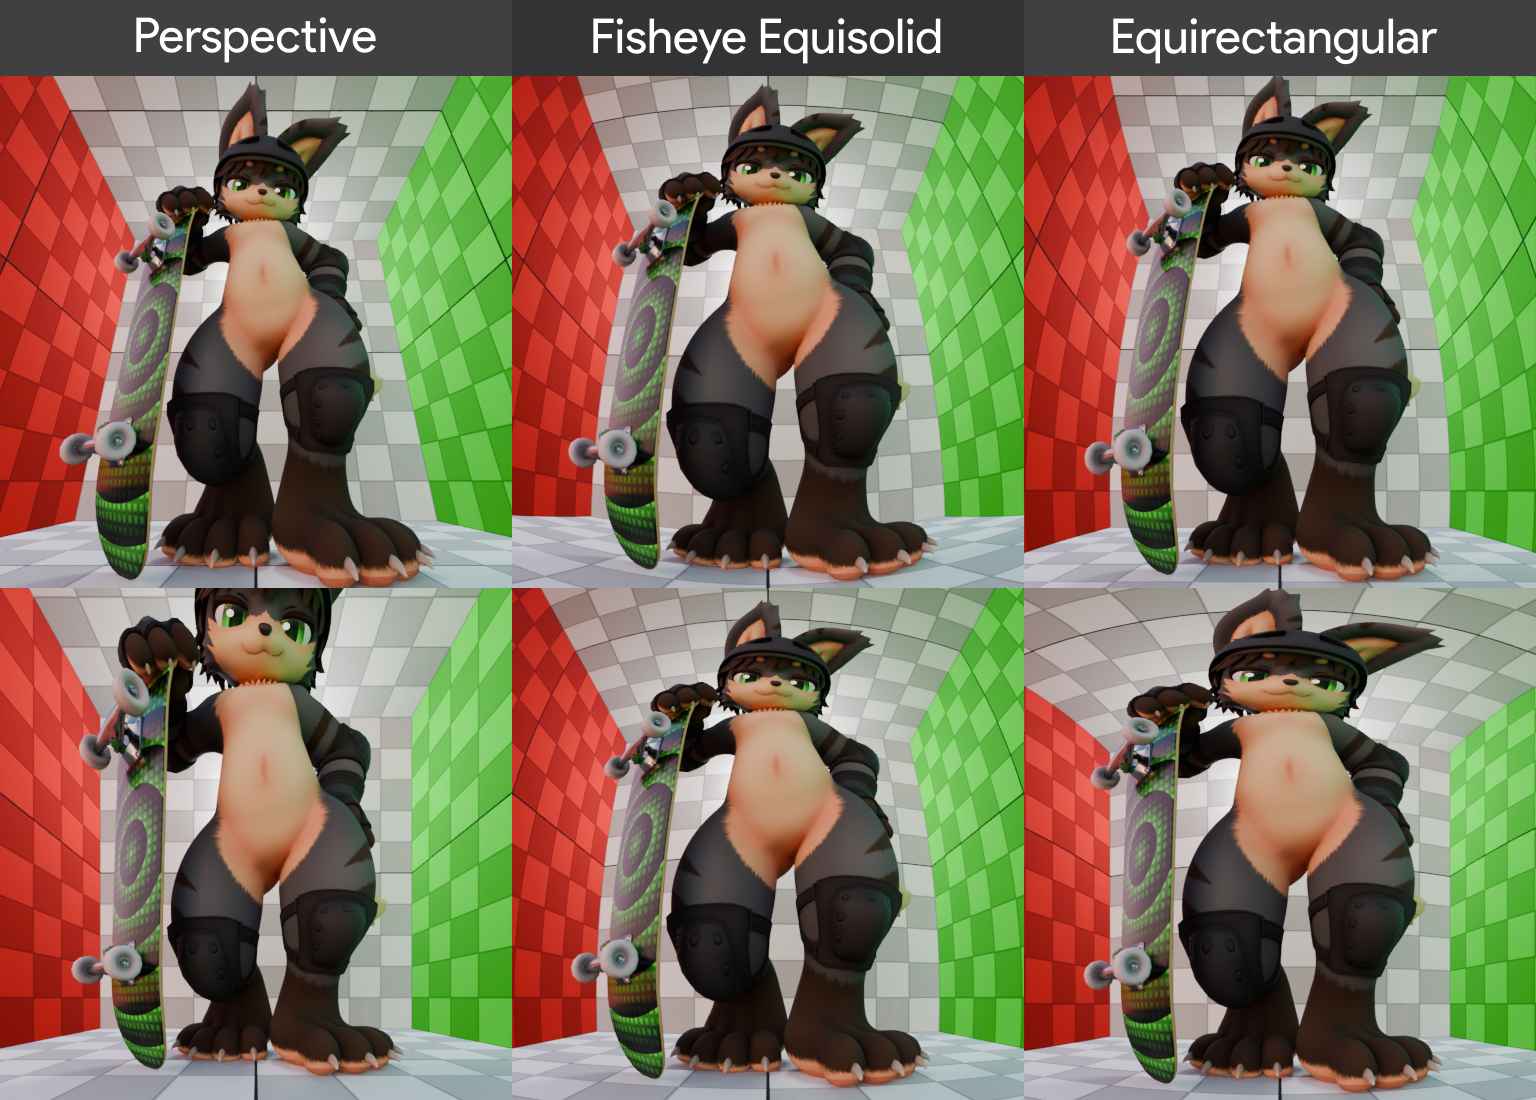
- Perspective
The classic, the good old, the default. Straight lines are straight lines, but things get very perspective distorted when you're on Quake Pro FOV. Notice how the checkered squares don't in the corner of the top left image don't look very much like squares anymore. - Orthographic
Parallel projection, not super useful for sizetrash other than making size comparison charts. - Panoramic
There are a number of panorama types in this, the most useful ones being:- Fisheye Equisolid
A fisheye lens! Very good for extreme FOV pictures, as the distortion is a lot more pleasing to the eye than the Quake Pro you get with a Perspective camera. Example: the squares in the corners of the top middle image look a lot more like squares! - Fisheye Lens Polynomial
Gives you 5 coefficients (K0 through K4) of a polynomial to play with. K1 is practically the focal length, and K2 can be thought of as the "bulgy-ness" of the lens. This is useful as it lets you have a distortion that's a mix between perspective and fisheye! The other coefficients are best left alone, but you can mess with them to create some truly trippy projections. - Equirectangular
Lets you do 360° panorama images, but you can adjust the latitude and longitude to your liking. The neat thing about this lens type is that vertical lines are preserved while horizontal ones get bent (see the bottom right image). There's a trick here: if you rather want horizontal lines to be preserved, you can rotate the entire camera 90 degrees, and un-rotate the image after it's rendered (top right image)
- Fisheye Equisolid
In addition to the lens type and FOV you can also adjust the X and Y shift of the camera, which lets you pick a different "crop" of the projection, just like a real shift lens! Useful for all of the lens types, as it lets you adjust what's in frame without altering the projection and distortion. The bottom row in the picture above have the camera pointing horizontally, and the frame is shifted upwards (or downwards? idk). The more you shift the frame, the more distortion you get, as the lenses all have the least amount of distortion at the center.
the struggle of choosing the best angle
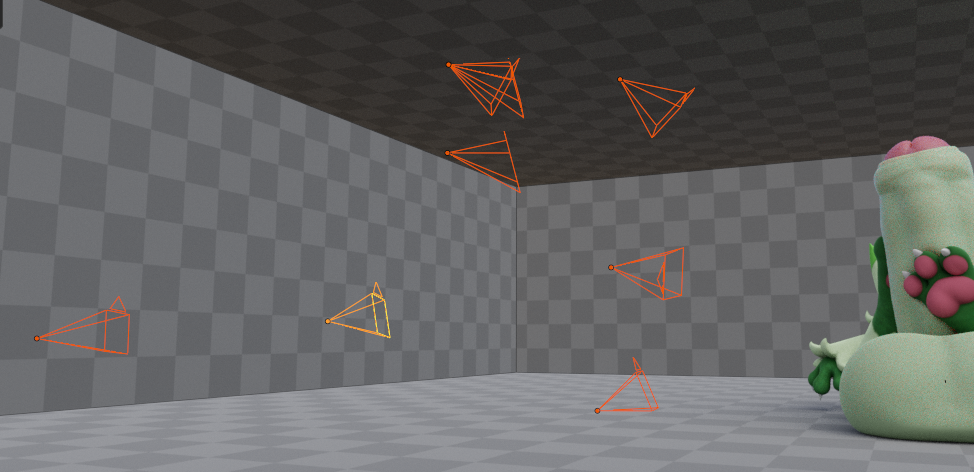
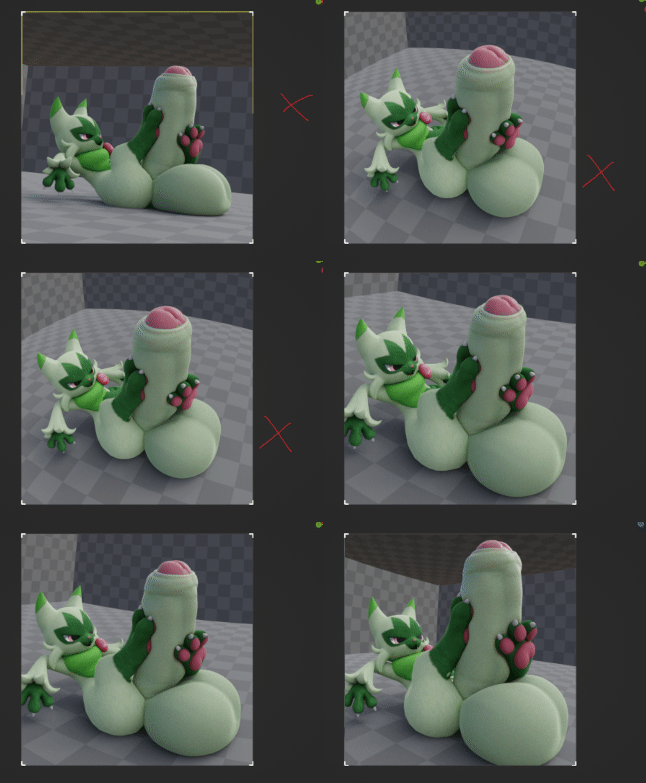
Sometimes you find more than one possible camera angle, and it can be difficult to decide on which one you want to go with. I typically make a copy of the camera each time I find a candidate camera angle, and jump into the new camera to see if any nearby camera angles are better. I then take a screenshot of each camera angle so that I can quickly swap between them (without having to wait for noise to resolve). Swapping between two images rapidly is the easiest way to tell which of them you like best, and if you have more than two images you can pit them up against each other until one winner emerges as the "best" camera angle.
tl;dr
make a scene first and find poses for characters and camera angles later
or
pose a character and find a camera angle then build a scene tailored to that camera
or
do a mix of both, or anything you want
also try fisheye lenses, they're good.